How to add a transfer resource?
Categories: Bookings
Step 1
Transfer resource - it is a type of vehicle (pick-up resource or drop-off resource), which may be assigned to the resource card “Bookings > Manifest view”, “Bookings > Transfer view”.
Go to “Manage > Resources”.

Step 2
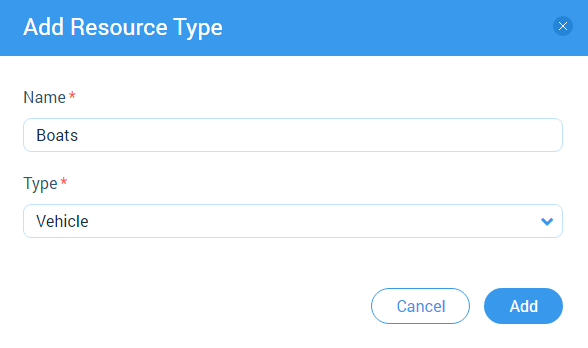
Click on “+ Add Resource Type” button.
Step 3
Fill out name of the resource type and choose “Vehicle” type for the resource. Click on “Add” button.

Step 4
Click on “+ Add New Resource” block or “+ Add Resource” button for add a transfer resource.

Step 5
Go to “Bookings > Transfer view”.

Step 6
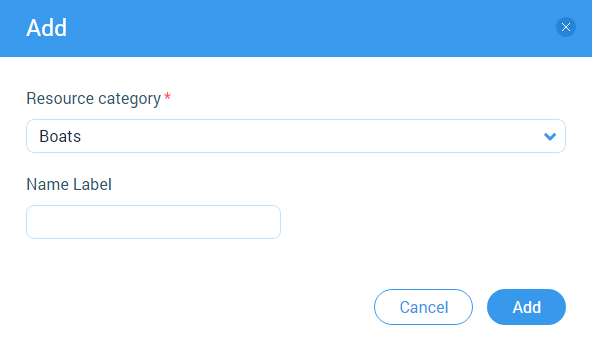
Click on “+ Add Resource Category” block or choose “Add resource category” menu item in the elipsis menu.

Step 7
Choose vehicle resource type category at the opened modal window. Click on “Add button”.

Step 8
Click on the dropdown field in the resource card which have been created and choose a resource option.

Related articles
Articles in this category
- Bookings data export
- Creating booking in the past
- Creating a custom "Manifest view"
- How to block available seats for the session?
- How to cancel a booking?
- How to cancel a session?
- How to change a booking status?
- How to configure columns in manifest?
- How to create a booking at "Bookings" in "Manifest view"?
- How to edit a booking?
- How to export a transfer resource?
- How to get a booking voucher?
- How to get a booking database?
- How to see bookings at transfer view?
- How to send a notification about booking that had been changed?
- How to send a message or upload an image for a booking?
- How to setup a session?
- How to sort a bookings?
- Pick-up and drop-off sessions
- Private and group transfer