Creating a custom "Manifest view"
Categories: Bookings
Step 1
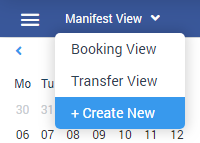
Go to “Bookings > Manifest view”.
Step 2
Select “+ Create New” menu item in the dropdown at the header.

Step 3
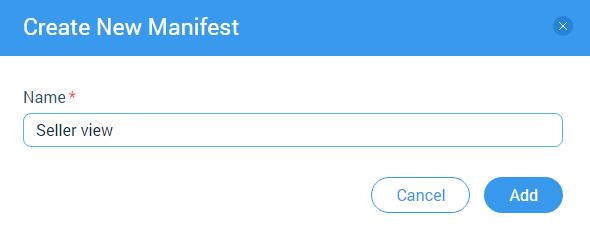
Enter custom manifest name and then click on “Add” button.

Suggestions
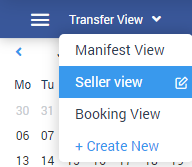
When a new custom manifest view is saved, a clone of the system manifest view with all its settings creates. After that, it can be configured, and all changes to it will be saved.
Created custom manifest view are accessible to everyone as well as the system ones and only the name of the custom manifest view is allowed to be edited.
Custom manifest view is available on all pages of the “Bookings” section, where there is a switch for views.

Custom manifest view is displayed only when the user is in the sections “Bookings > Manifest view”, “Bookings > Booking view” (only on those that are within the system for those user roles for which the custom view is available) and “Bookings > Transfer view”.
If the user is in a custom manifest view, then those type of a view is not shown in the dropdown.
Related articles
Articles in this category
- Bookings data export
- Creating booking in the past
- How to add a transfer resource?
- How to block available seats for the session?
- How to cancel a booking?
- How to cancel a session?
- How to change a booking status?
- How to configure columns in manifest?
- How to create a booking at "Bookings" in "Manifest view"?
- How to edit a booking?
- How to export a transfer resource?
- How to get a booking voucher?
- How to get a booking database?
- How to see bookings at transfer view?
- How to send a notification about booking that had been changed?
- How to send a message or upload an image for a booking?
- How to setup a session?
- How to sort a bookings?
- Pick-up and drop-off sessions
- Private and group transfer