How to setup an Agent profile?
Categories: Agents
Step 1
Go to “My Agents” section.
Step 2
Open an Agent profile by clicking on the card.

Step 3
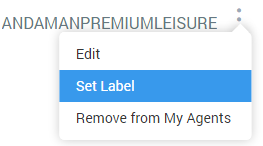
Click on the elipsis menu in the opened Agent profile and choose “Edit” menu item.

Step 4
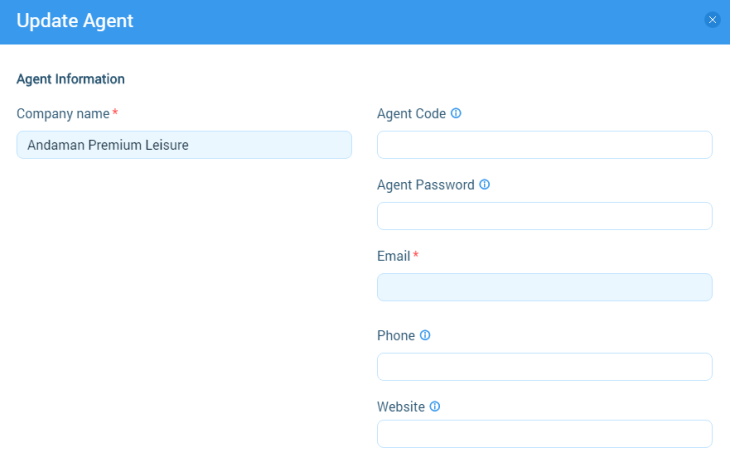
Setup the next information for Agent such as:
- “Agent Code” - information from this field is needed for authorization at Supplier’s “White Label”. Also, if agent code is no specified, then it is impossible to log in to the Supplier’s “White Label” under Agent;
- “Agent Password” - information from this field is optional and needed for authorization at Supplier’s “White Label”. Agent password will reset if agent code is non specified;
- “Email” - Agent e-mail address;
- “Phone” - Agent phone number;
- “Website” - Agent website;

- “Net Rates” - it is required to be selected.

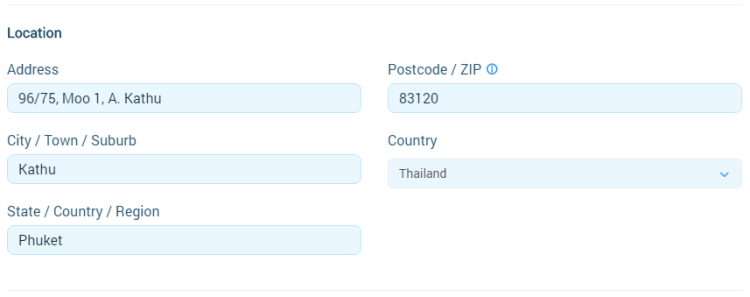
- “Location” - information about Agent location consist of several fields:
- “Address”;
- “City/Town/Suburb”;
- “State/Country/Region”;
- “Post code/ZIP”;
- “Country”;

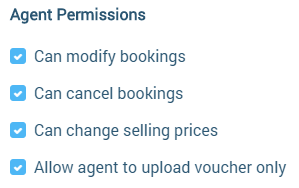
- Agent Permissions:
- “Can modify bookings” - Agent can change bookings if this option is checked on;
- “Can cancel bookings” - Agent can cancel bookings if this option is checked on;
- “Can change selling price” - Agent can setup selling price for Supplier’s tours in the “Checkout” modal window;
- “Allow agent to upload voucher only” - If this option is enabled, then for Agent in the booking module under the number of people the “Upload Voucher” field is displayed to download the Voucher image. If it loads, then all other fields after it become optional. All fields above are required, including the number of participants, date and time of a tour.

Step 5
Click on “Save” button for accept information that had been changed.
Step 6
Set label for an Agent. Choose a “Set Label” menu item in the ellipsis menu.

Input a label name and click on “Save” button.
